Vercel


Overview
Vercel enables developers to build and publish wonderful things. They build products for developers and designers. And those who aspire to become one. This makes it the perfect tool for building web apps with Supabase.
IPv4 Migration
You may need to redeploy your production deployment
If you have not deployed since 27th Jan 2024, you must redeploy the latest production deployment for new environment variable changes to take effect.
Beginning on Monday, Jan 29th 2024, we will be migrating services to IPv6 and spinning down pgBouncer. Vercel does not support IPv6, so we have updated the environment variables to Supavisor, which supports connections over IPv4.
We have updated the environment variables as follows
POSTGRES_URL - Supavisor URL
POSTGRES_PRISMA_URL - Supavisor URL
POSTGRES_URL_NON_POOLING - Supavisor URL on session mode. If you want to connect to the database directly, purchase the IPv4 addon and manually update this environment variable.
To avoid any downtime, we strongly urge you to redeploy your Vercel current Production deployment for the new environment variables to take effect. Read the Vercel docs on redeploying a project here. If your Vercel project has made a production deployment since Jan 27th 2024, you can ignore these instructions.
You can read more about these changes here: https://github.com/orgs/supabase/discussions/17817 and if you have any questions or concerns, please open up a ticket.
Documentation
This guide steps through using Vercel's dashboard to create a Next.js project integrated with Supabase. To further streamline the process, we will be using the Next.js starter template, which can be automatically forked to a new GitHub repo, without leaving the dashboard!
If you don’t have a Vercel account, create one here.
Step 1: Create a Supabase project
This guide could use an existing Supabase project, but to create the todo demo from scratch, navigate to Supabase, click Sign In and authenticate with GitHub to login or register a new account.
From the Supabase dashboard, click New project and select an organization.
Note: You may need to create an organization first.
Give your project a name, password, select a region close to your potential users and click Create new project.
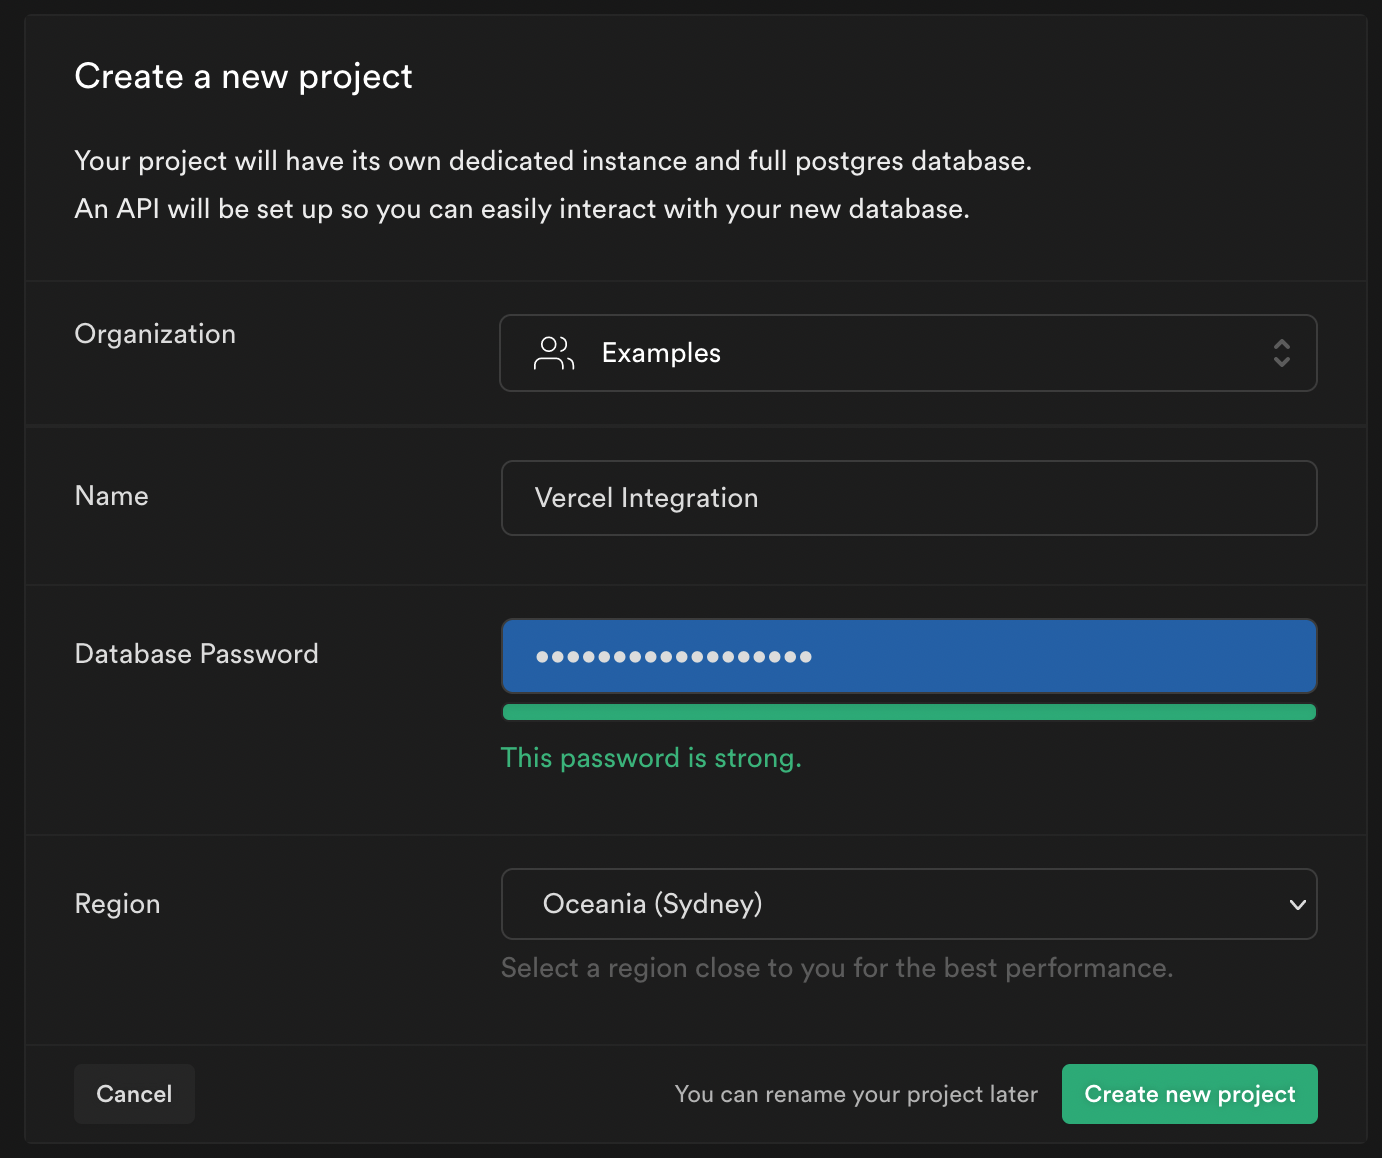
Supabase will take a couple of minutes to configure the infrastructure.
Once this is finished, navigate to SQL Editor from the sidebar menu and click New query.
This will create a new SQL snippet called "New Query". Copy and paste the following and click Run.
_20create table todos (_20 id bigint generated by default as identity primary key,_20 title text,_20 is_complete boolean default false,_20 created_at timestamp with time zone default timezone('utc'::text, now()) not null_20);_20_20alter table todos enable row level security;_20_20create policy "Anyone can view todos" on todos for_20 select using (true);_20_20create policy "Anyone can add new todos" on todos for_20 insert with check (true);_20_20insert into todos(title)_20values_20 ('Create Supabase project'),_20 ('Create Vercel project'),_20 ('Install Supabase integration');
This will create a new todos table, enable row level security, add policies for selecting and inserting data, and add some example rows.
Note: To simplify this example, we are allowing anyone to
selectandinsertrows on thetodostable. Usually, these actions would be locked down to only allow logged in users to perform them. Check out this video to learn more about Row Level Security and policies.
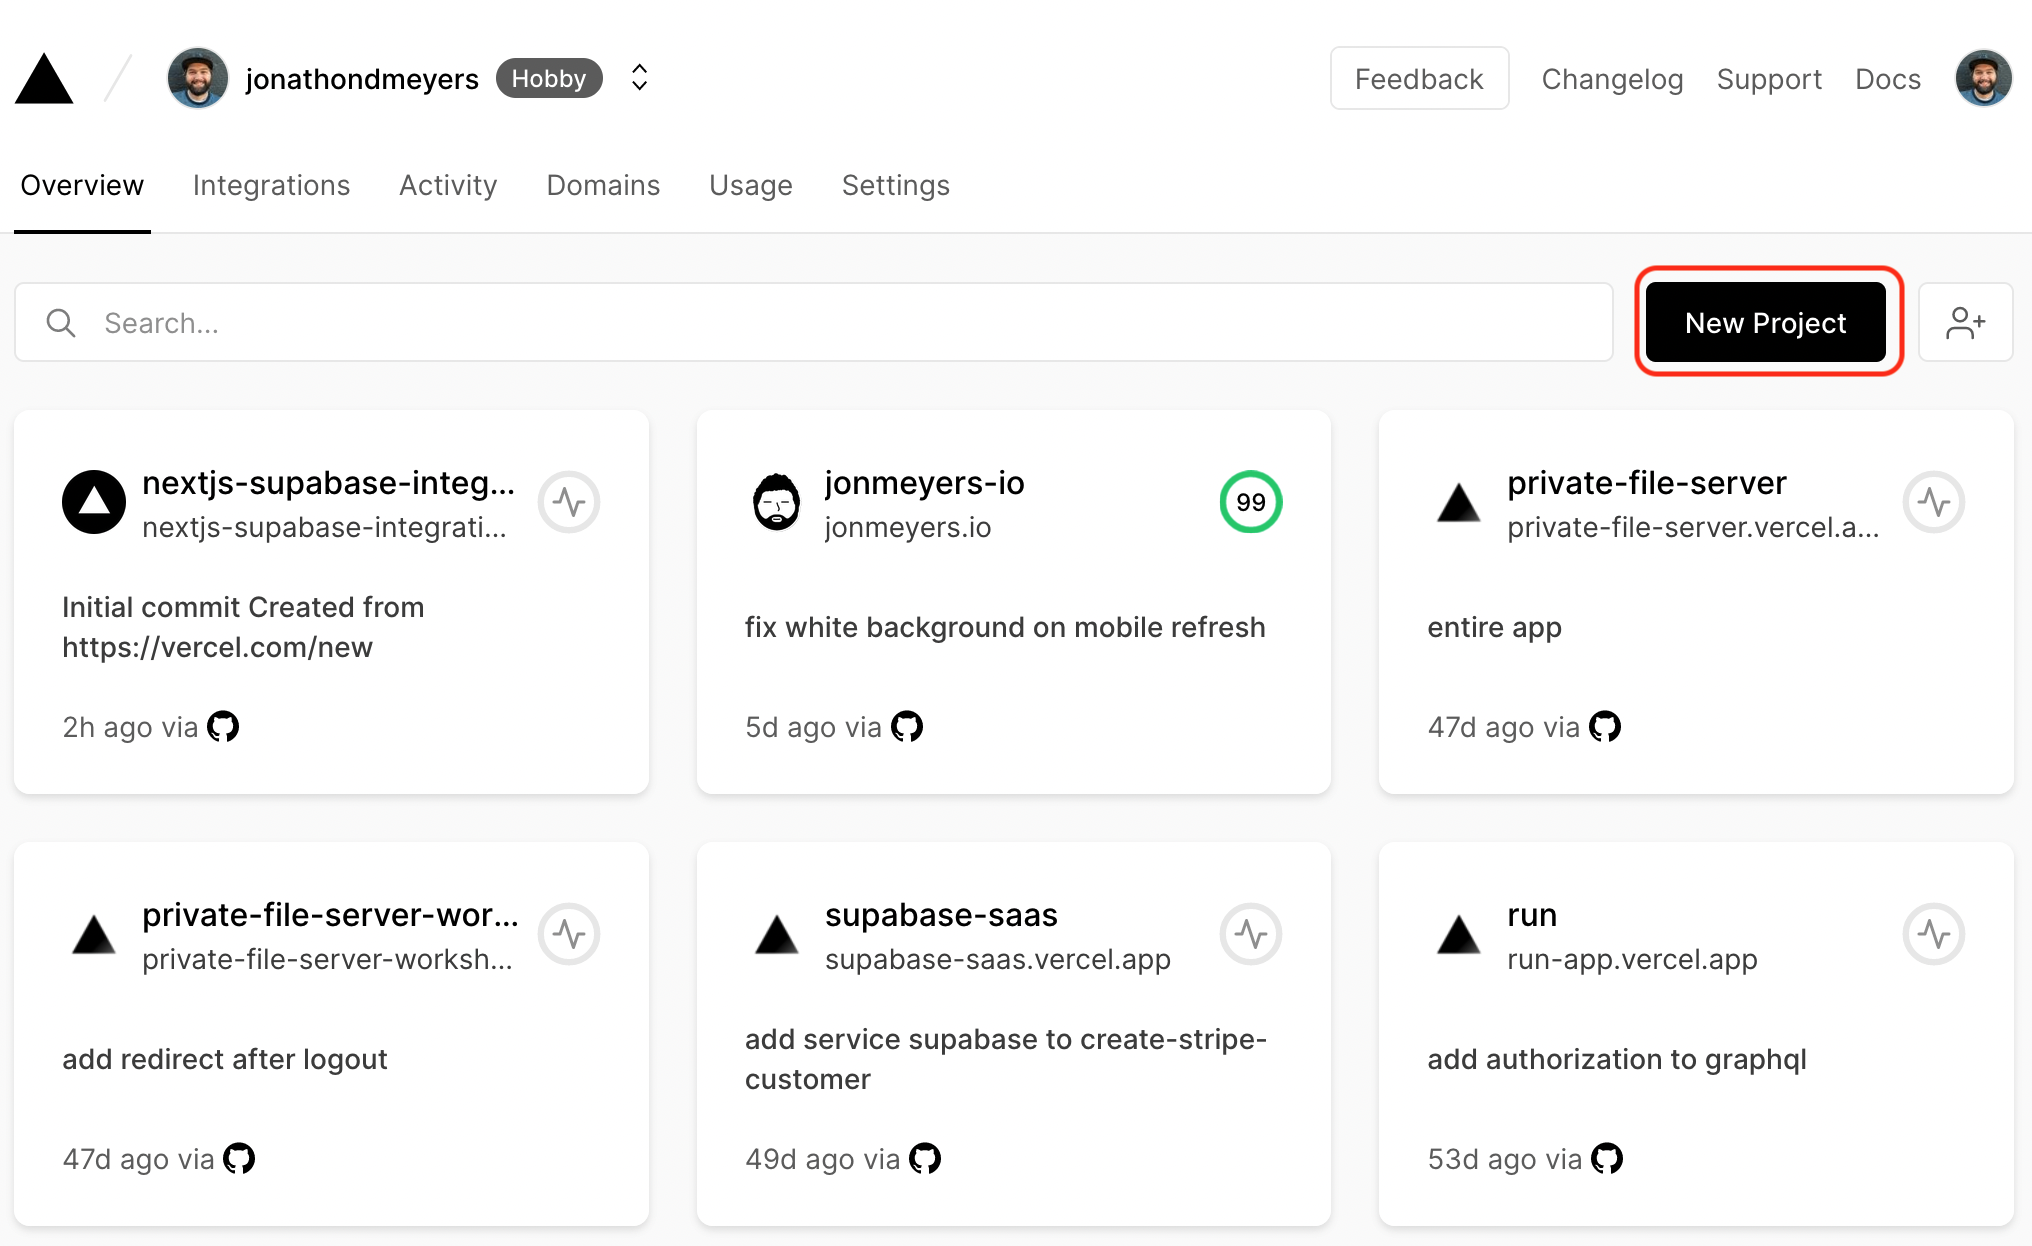
Step 2: Create Vercel project
From your Vercel dashboard, click New Project.
Under the Clone Template menu, click Next.js.
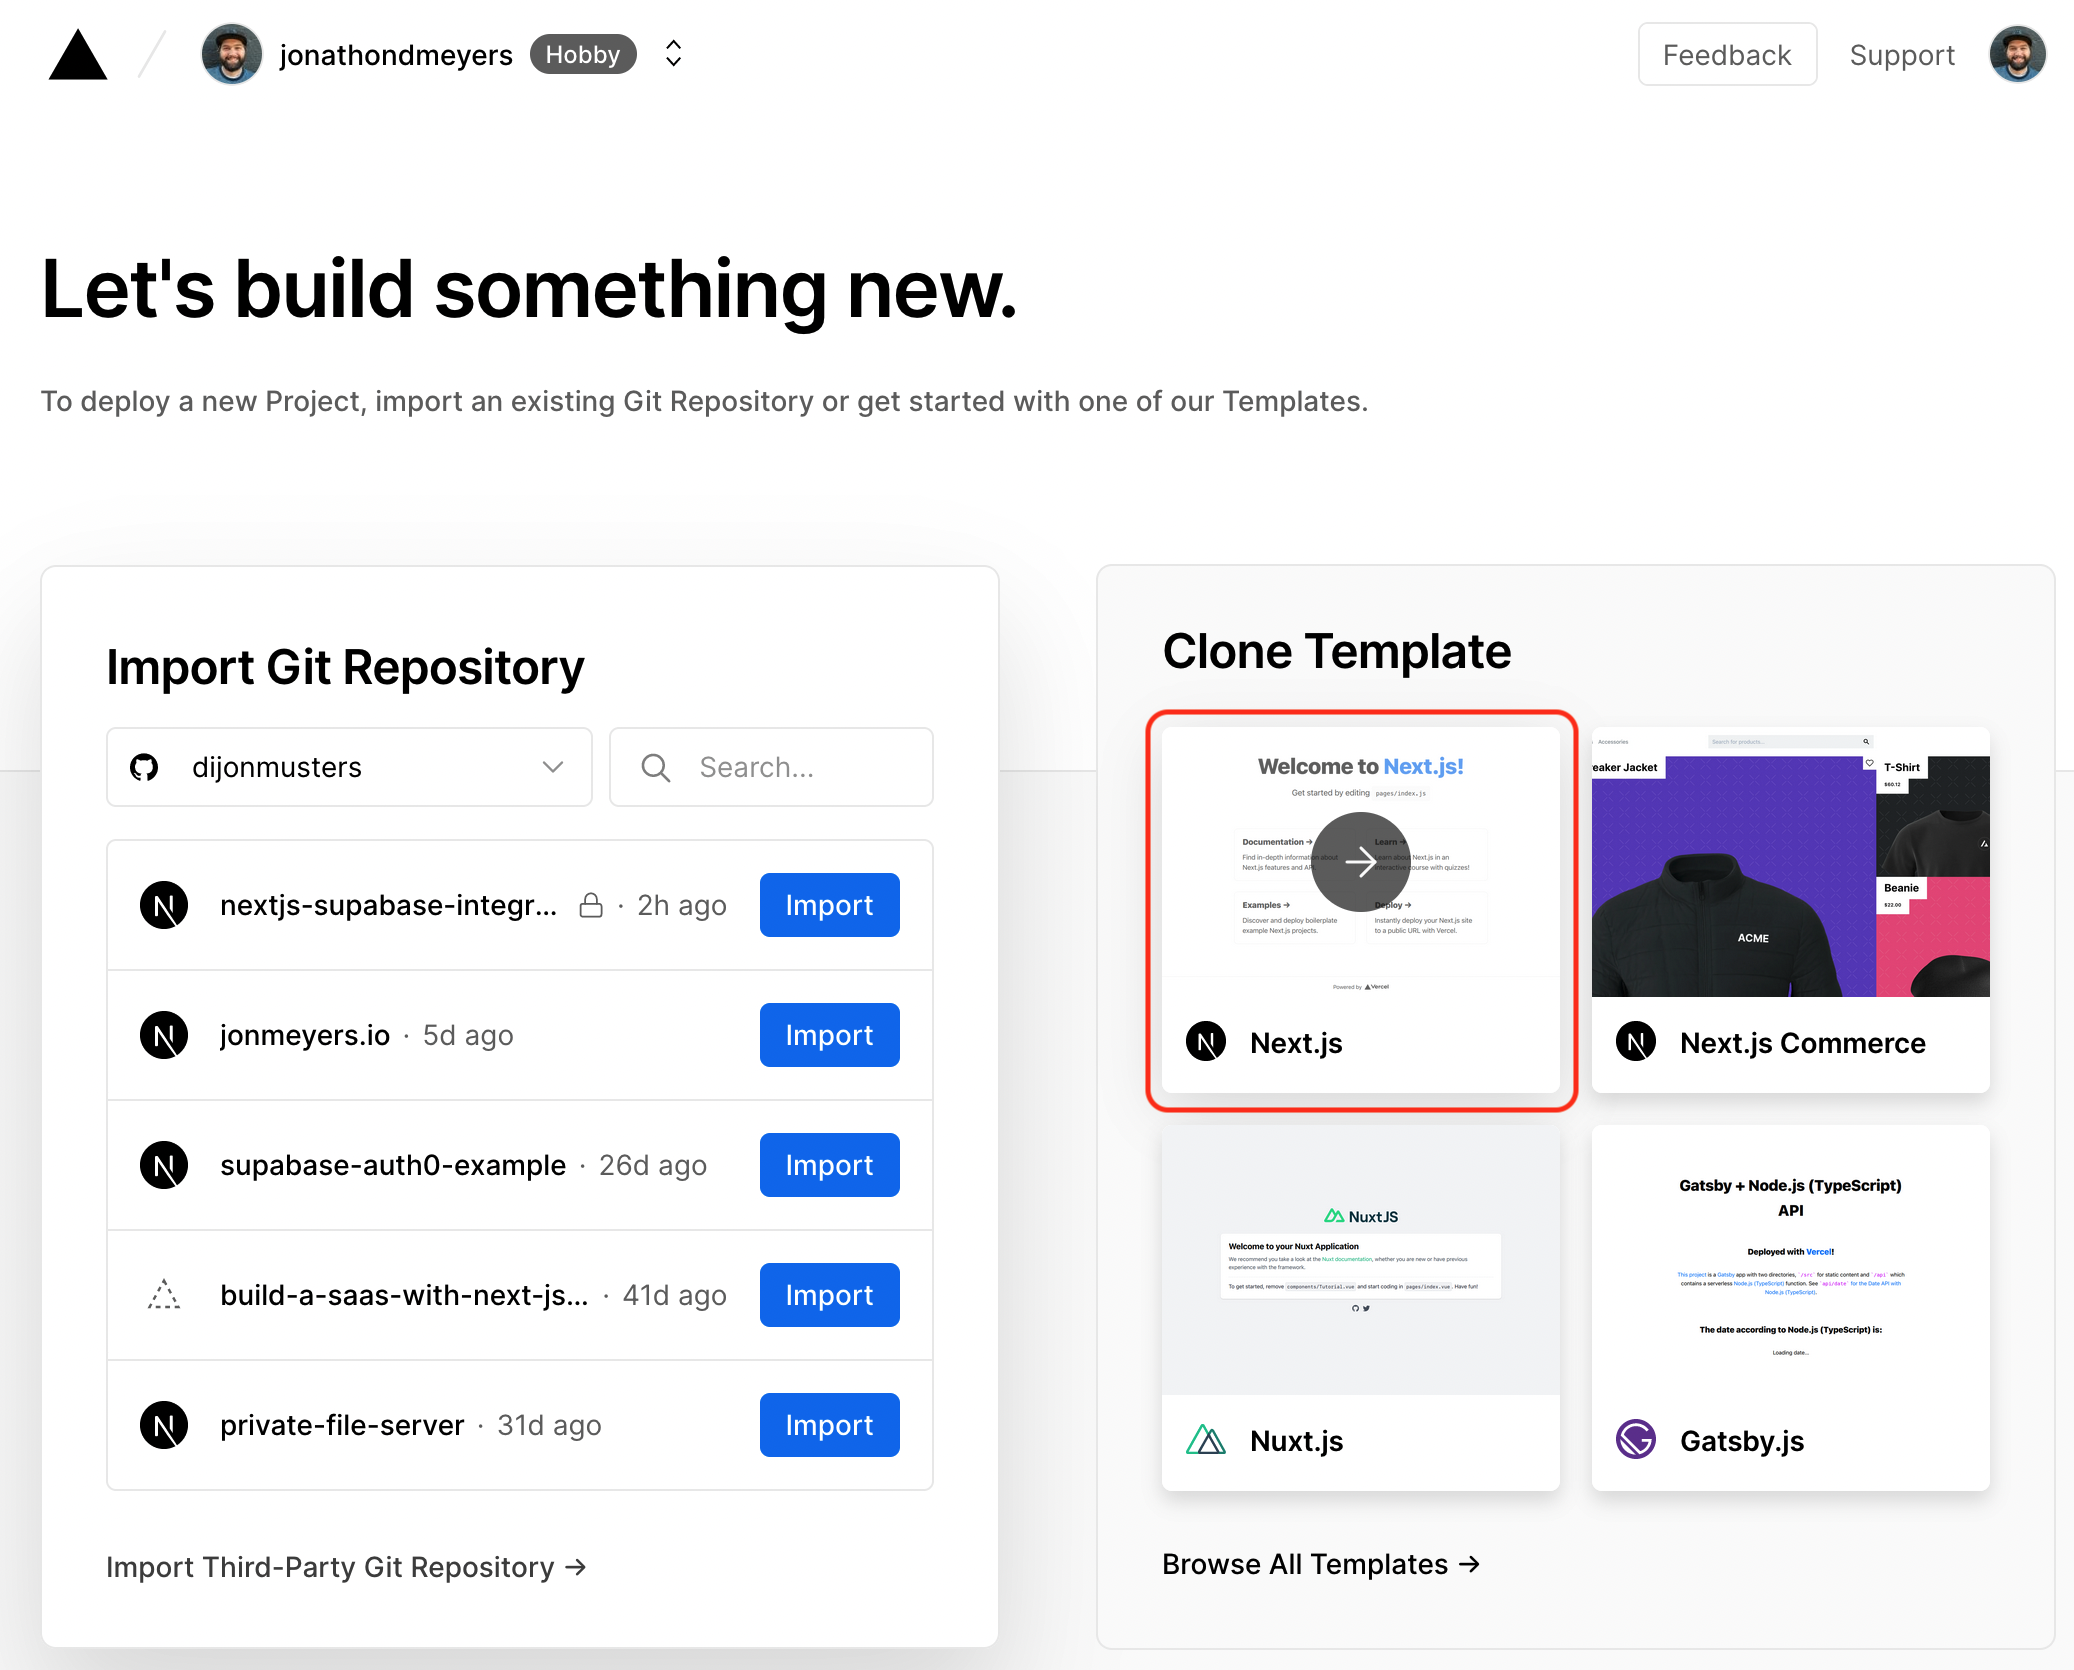
In the Create Git Repository section, click GitHub, select your username under GIT SCOPE, enter a name for your project, choose whether you want your repo private or public, and click Create.
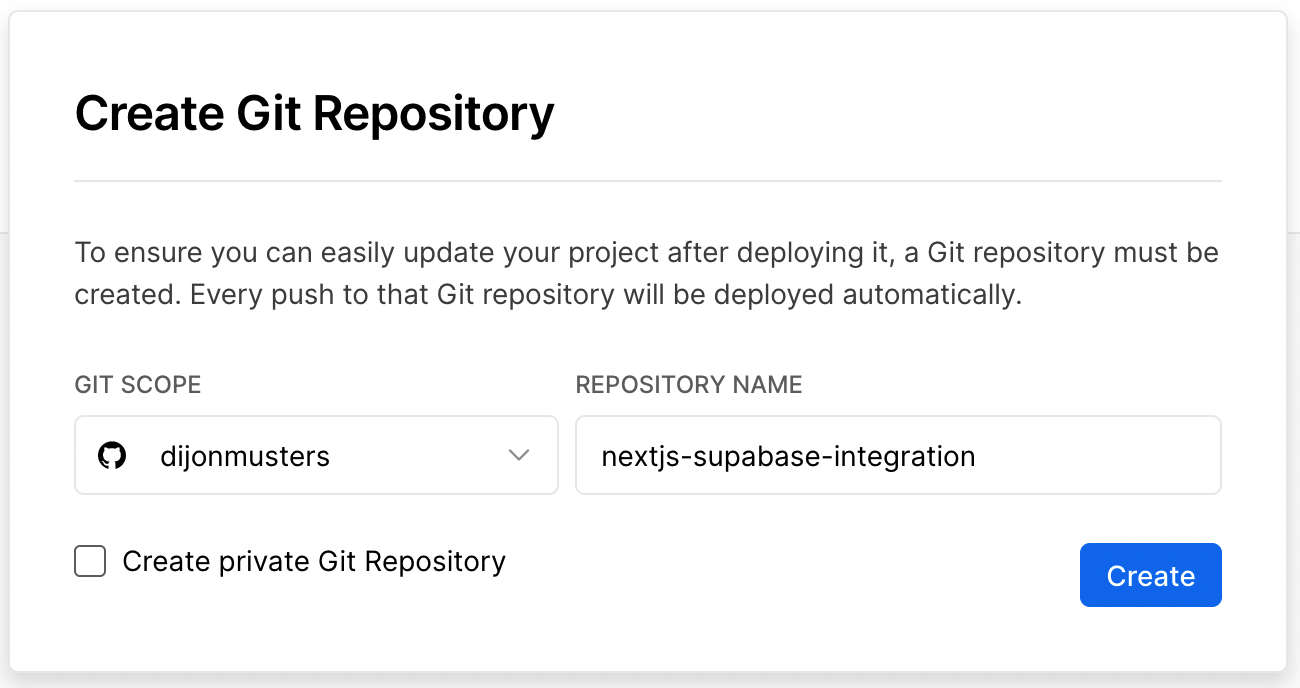
This will create a new GitHub repository, clone and commit the Next.js starter project, then build and deploy your new project to Vercel.
Once you have been redirected to the Congratulations screen, click Go to Dashboard.
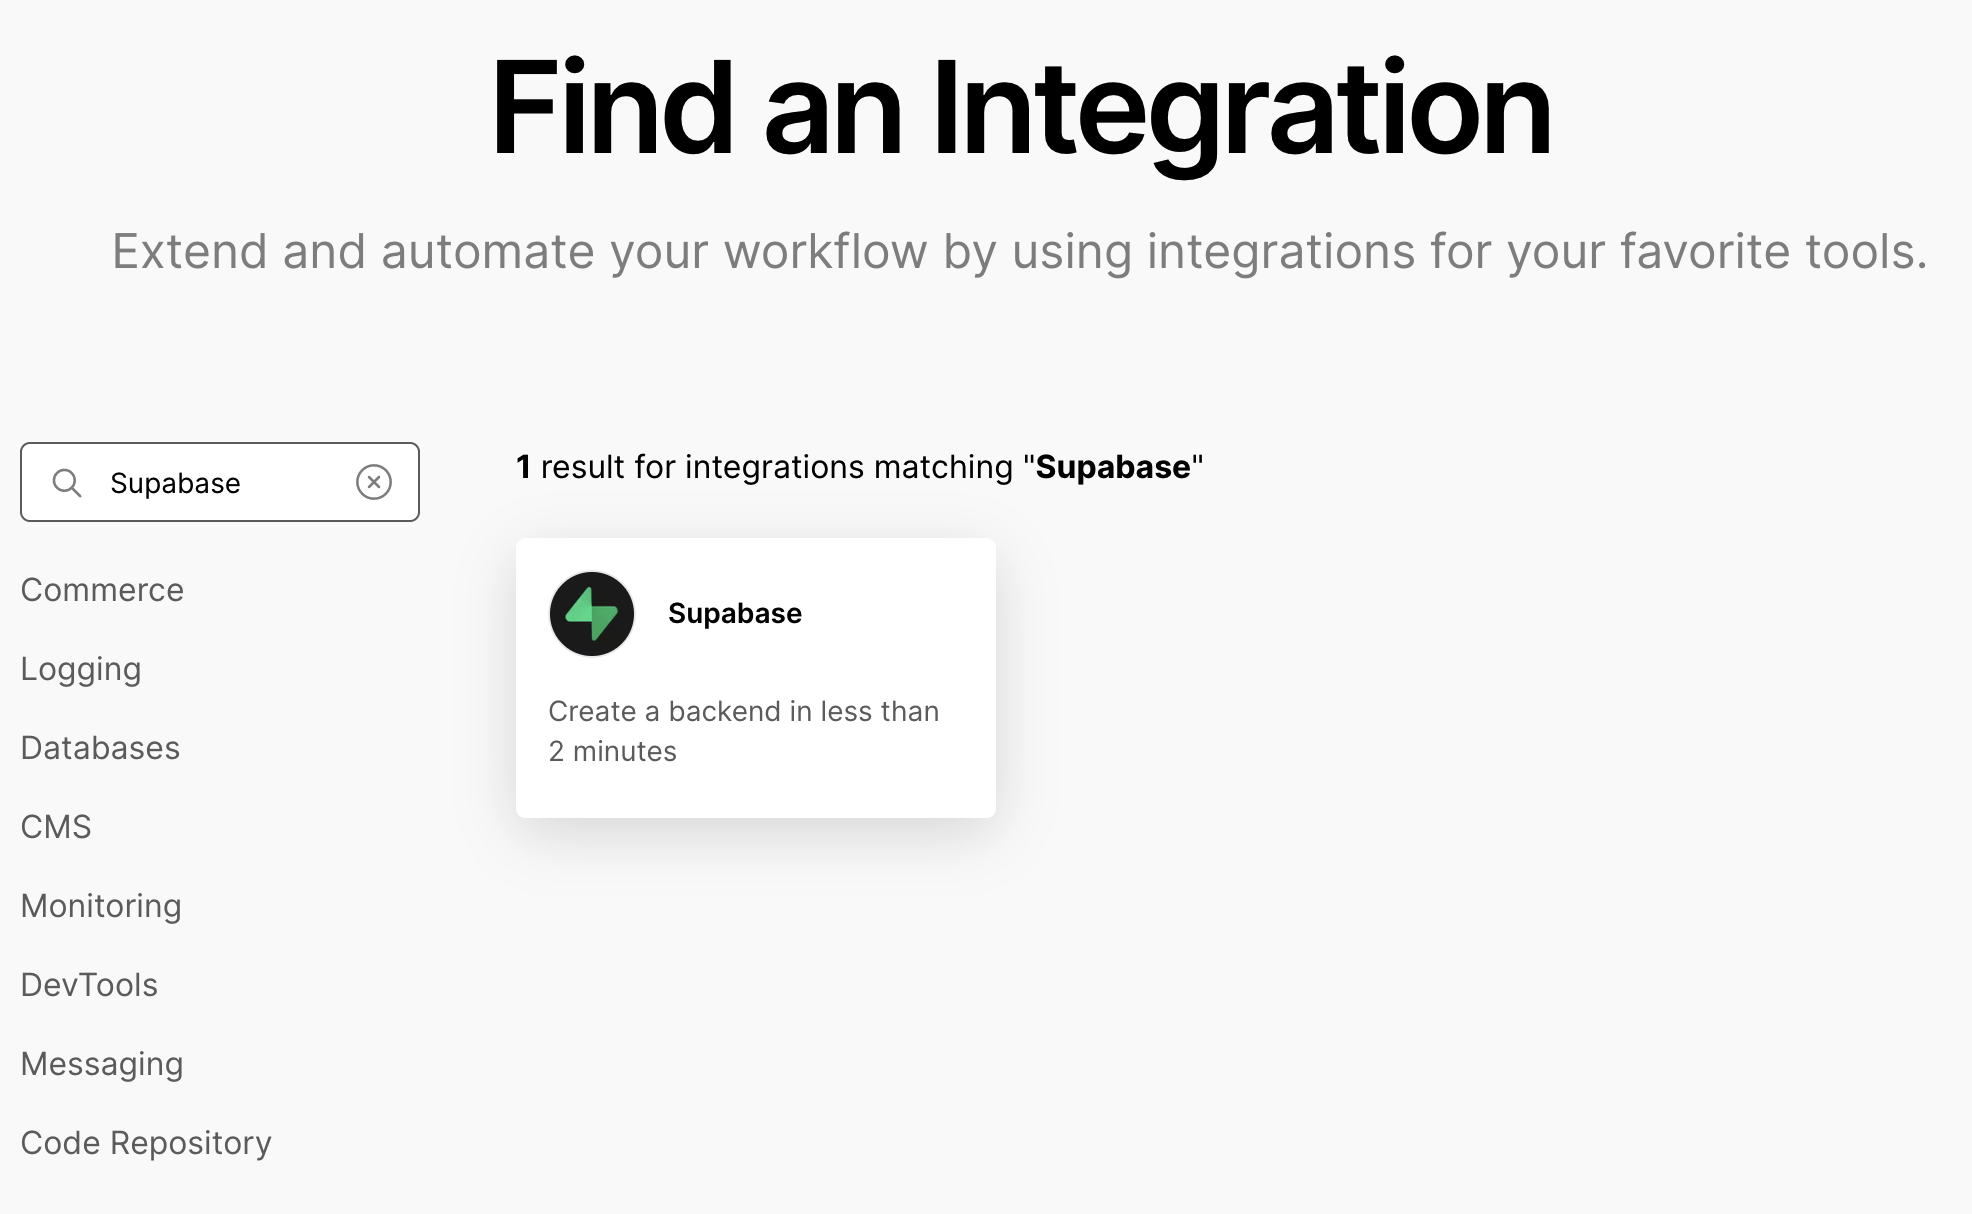
Navigate to Settings, Integrations, then click Browse Marketplace.
Search for Supabase and click the Supabase integration.
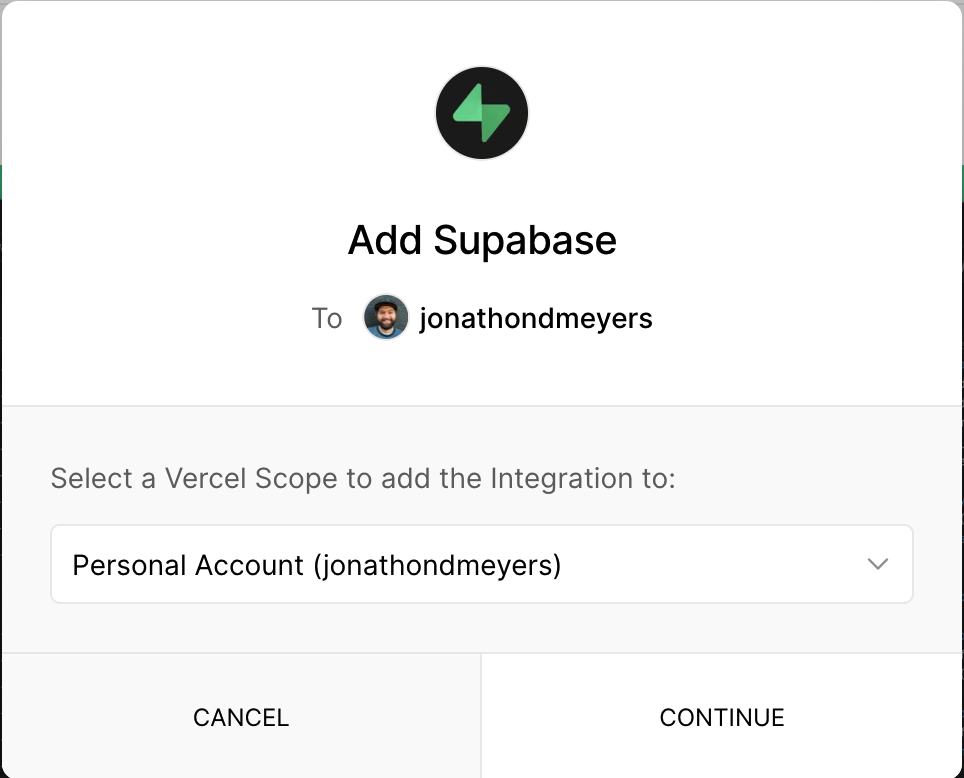
Click Add Integration. Select your account from the Vercel Scope dropdown, and click CONTINUE.
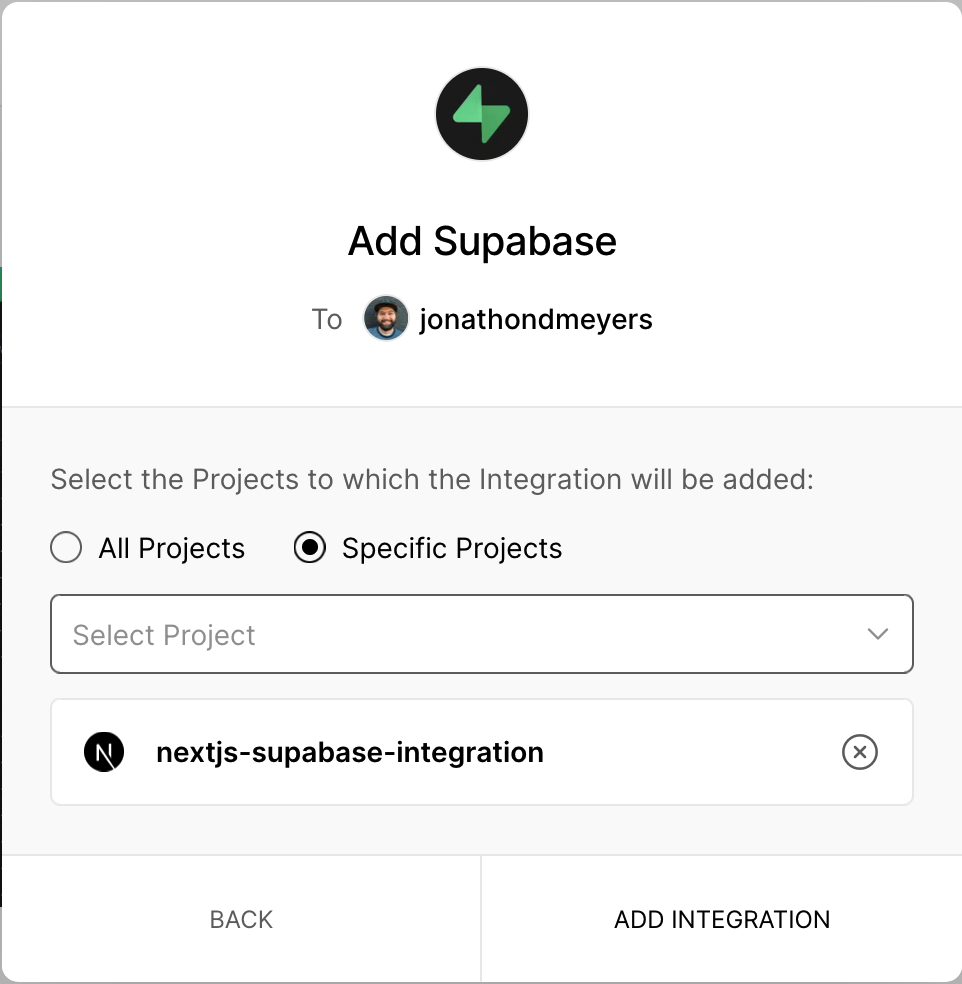
Choose Specific Projects and select your new Vercel project from the dropdown, and click Add Integration.
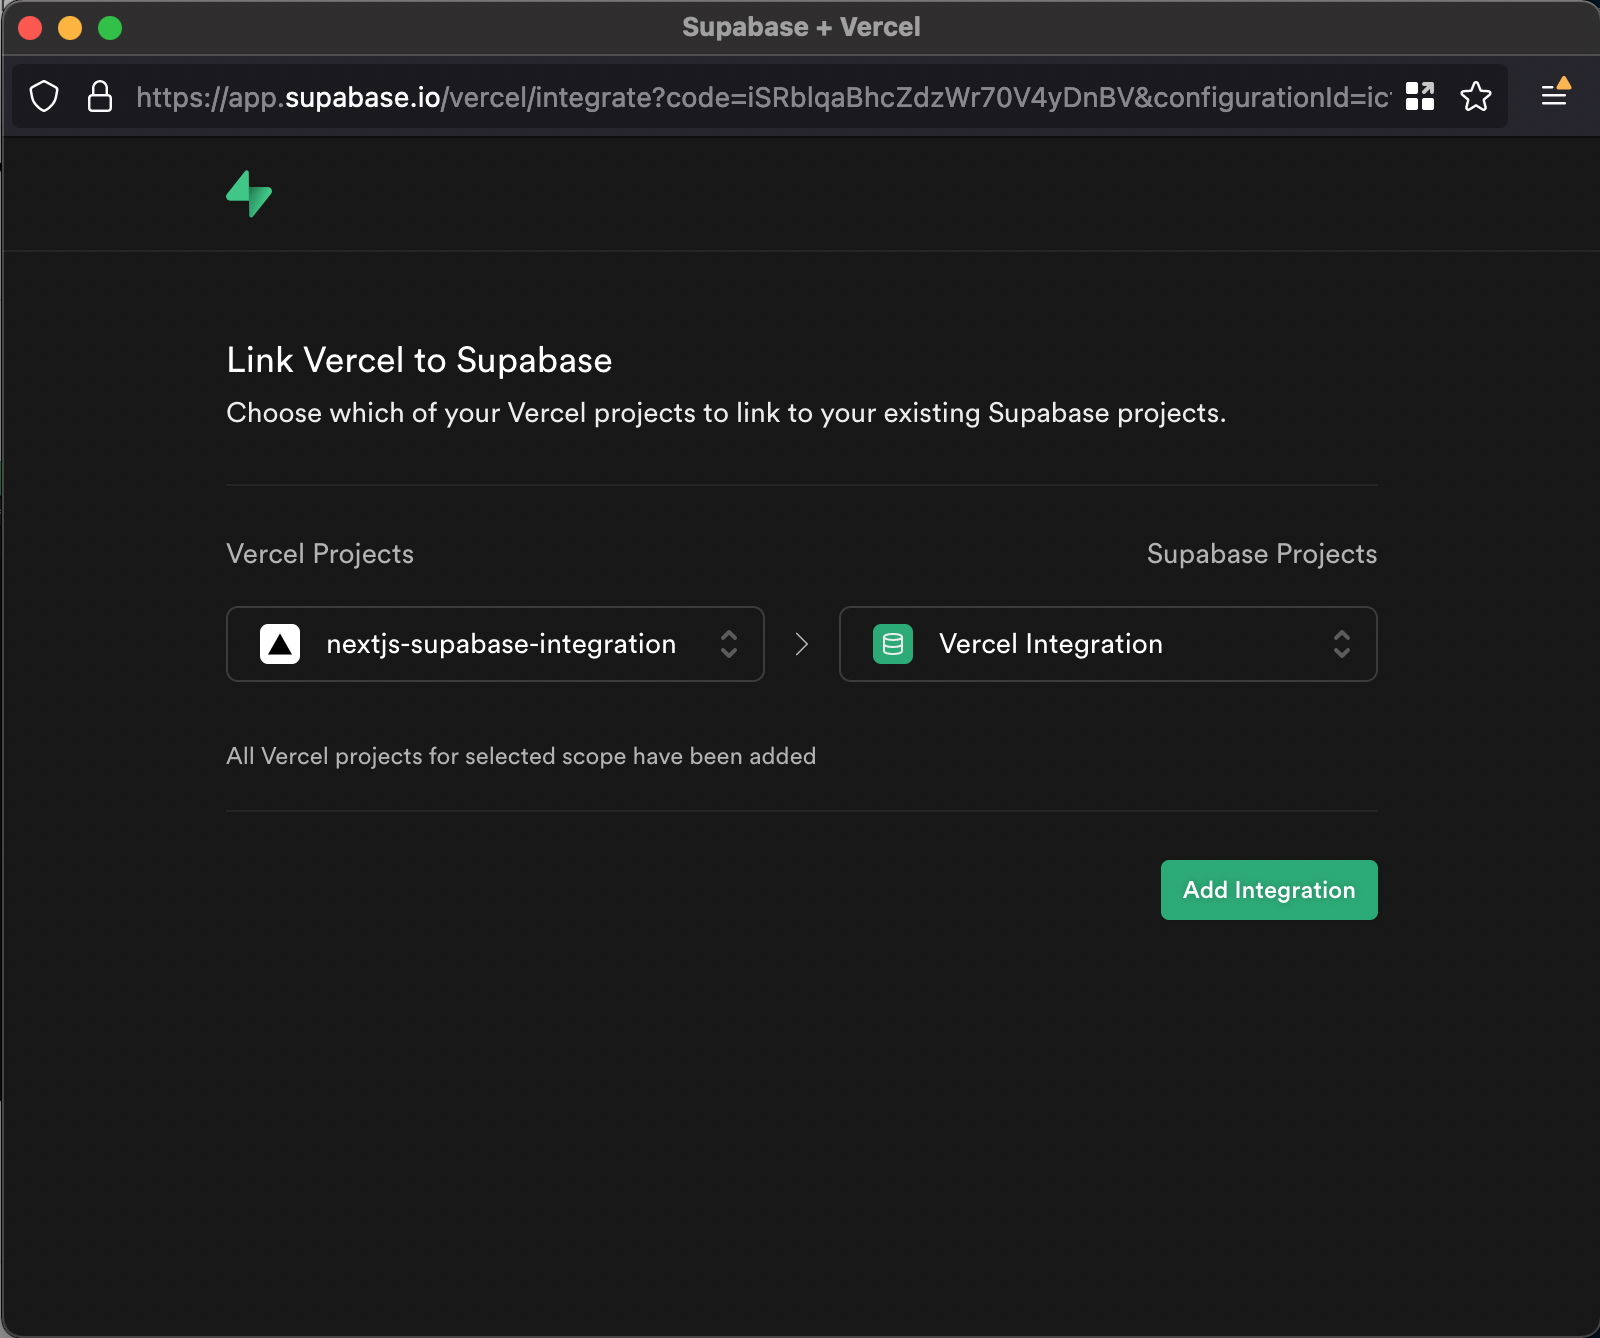
From the Supabase popup, select your new Vercel Project and Supabase project from the dropdowns.
Step 3: Clone GitHub repo
The fastest way to get this project running locally is to clone the repo that Vercel created for us.
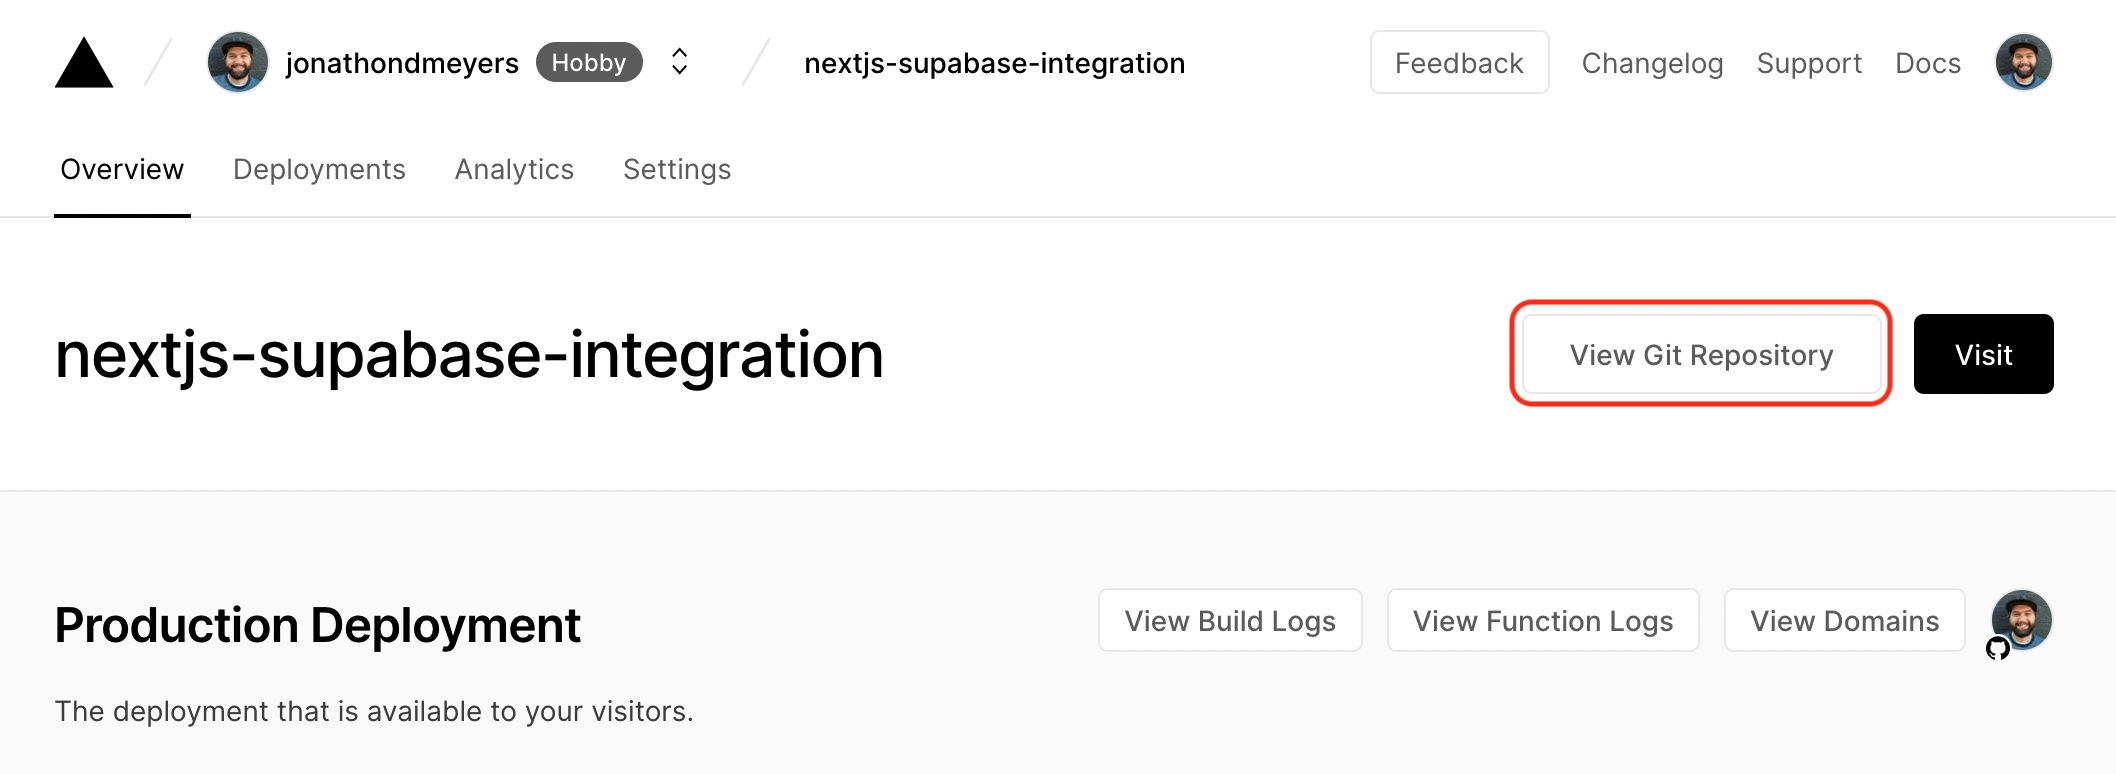
Navigate back to the Vercel project Overview page, and click View Git Repository.
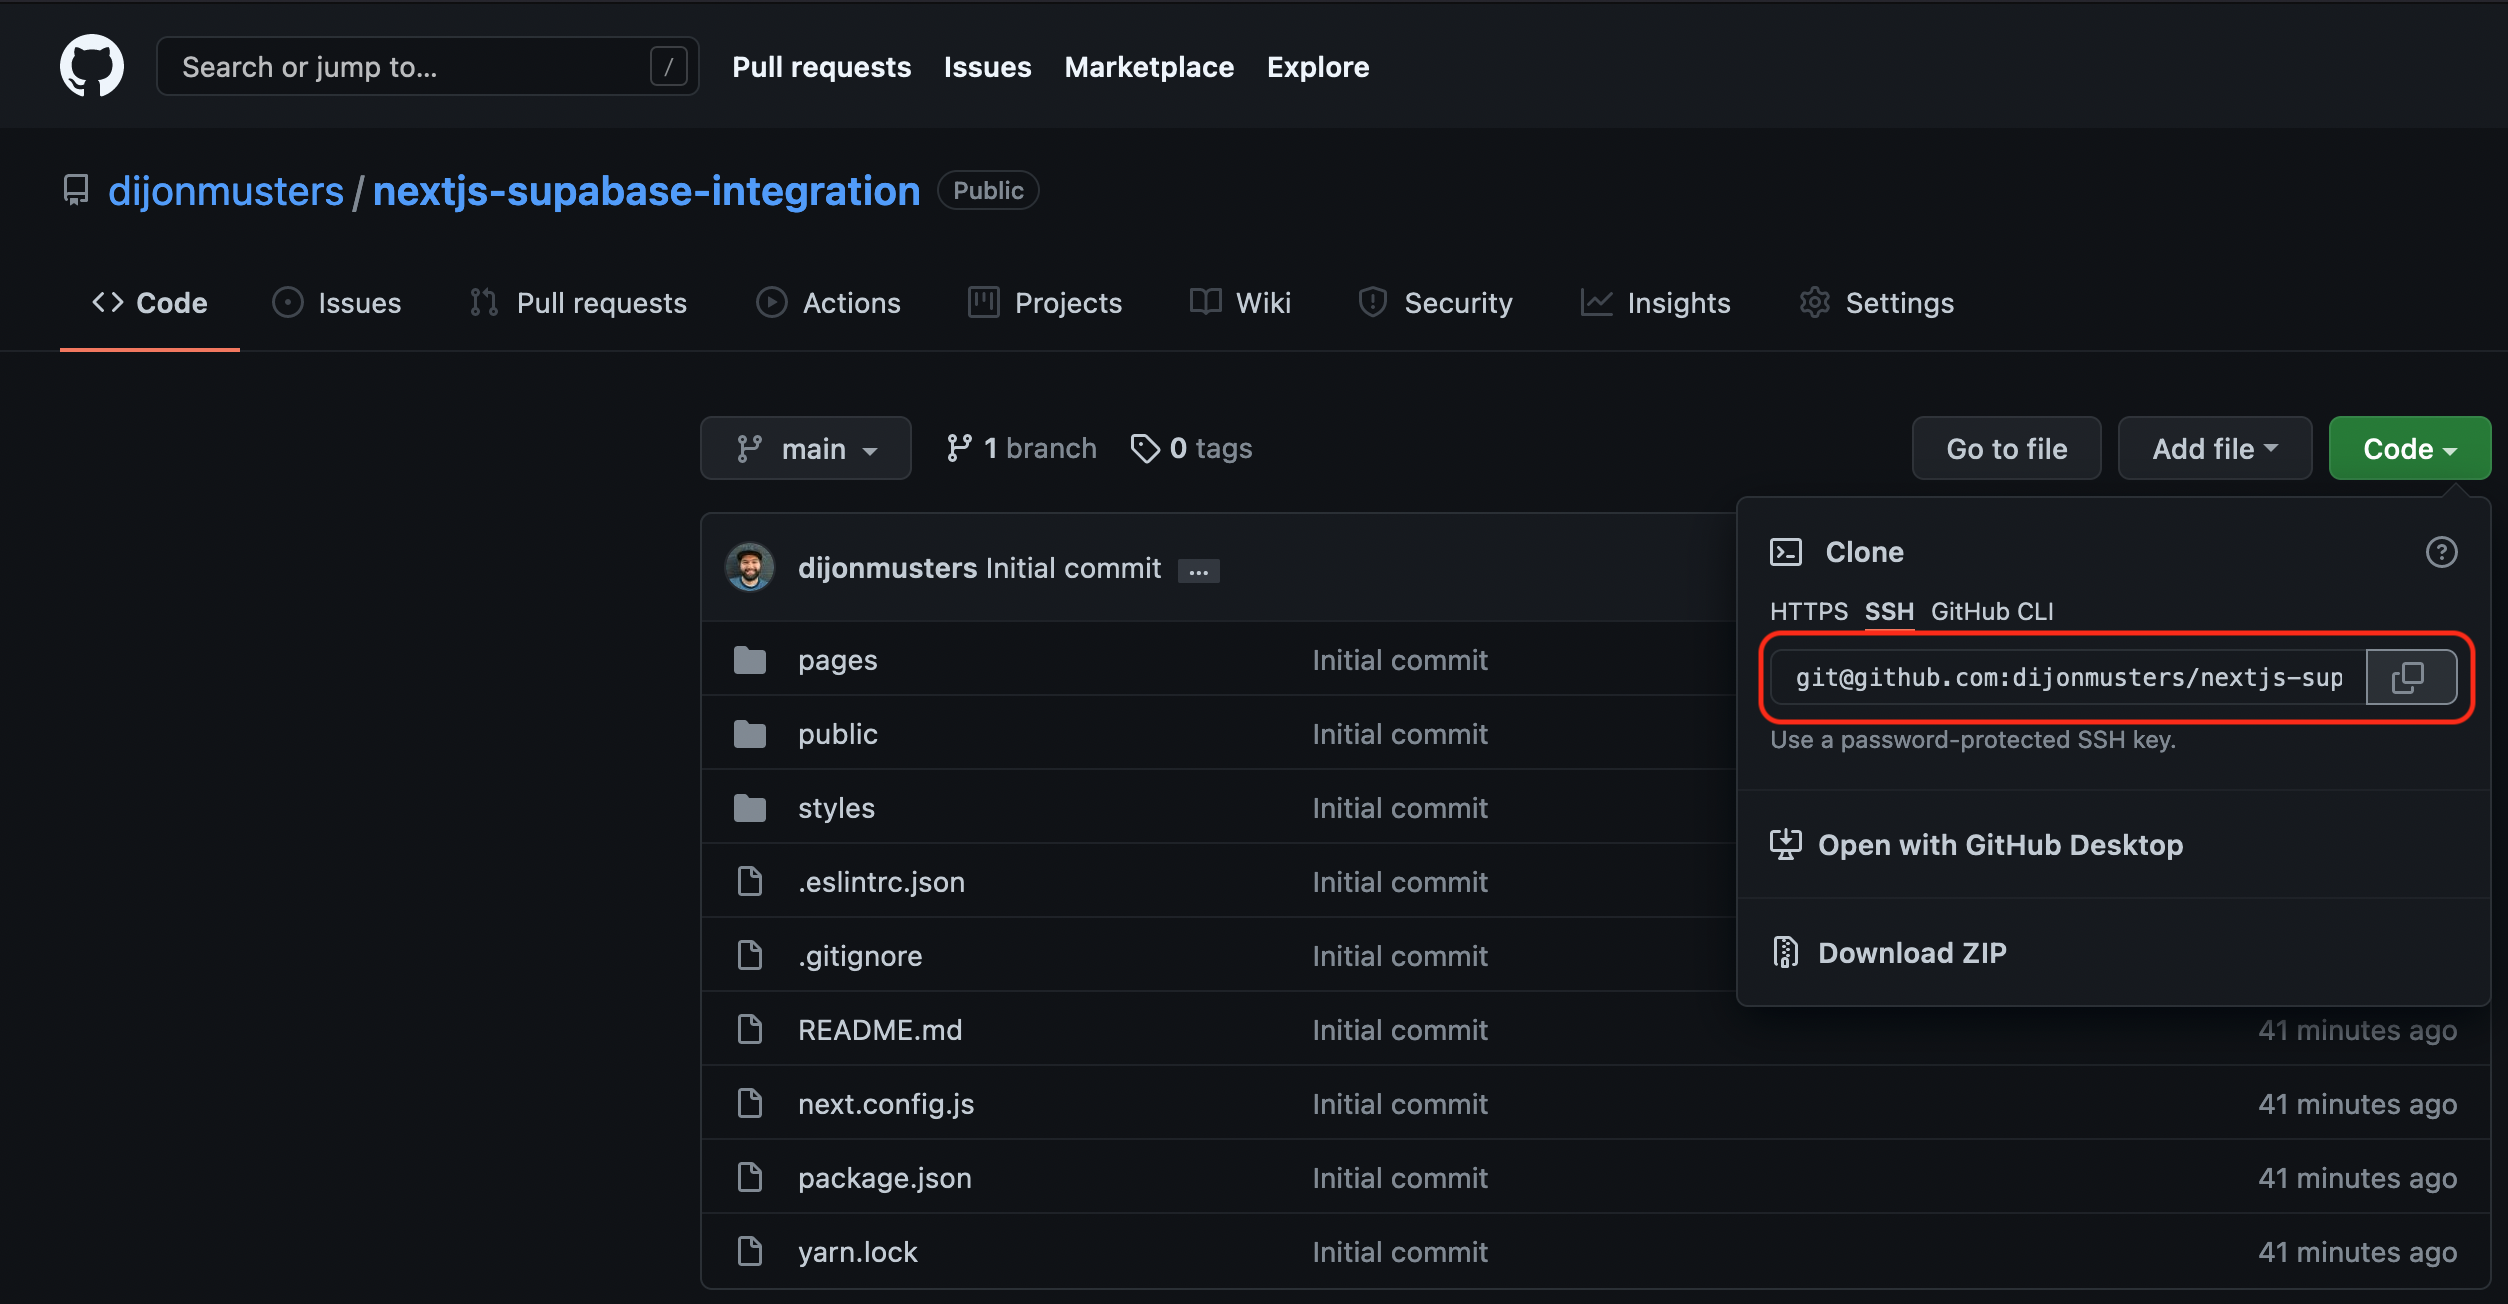
This will open the GitHub repo. From here, click the arrow next to Code and copy the url from the dropdown.
Open a terminal window or CLI and run the following command to clone the GitHub repo.
_10git clone your-repo-url.git
Open the project in your code editor of choice, and update the contents of pages/index.js to the following:
_10import styles from '../styles/Home.module.css'_10_10export default function Home() {_10 return <div className={styles.container}>working</div>_10}
Run a local development server.
_10npm run dev
Navigate to http://localhost:3000 to confirm the project is "working".
Step 4: Pull environment variables from Vercel
First, we need to login to Vercel using their CLI tool.
_10npx vercel login
This will ask if we are happy to install vercel. Type y and hit Enter.
We will then need to authenticate Vercel by selecting Continue with GitHub.
This will open a browser window where you need to authenticate with your GitHub account.
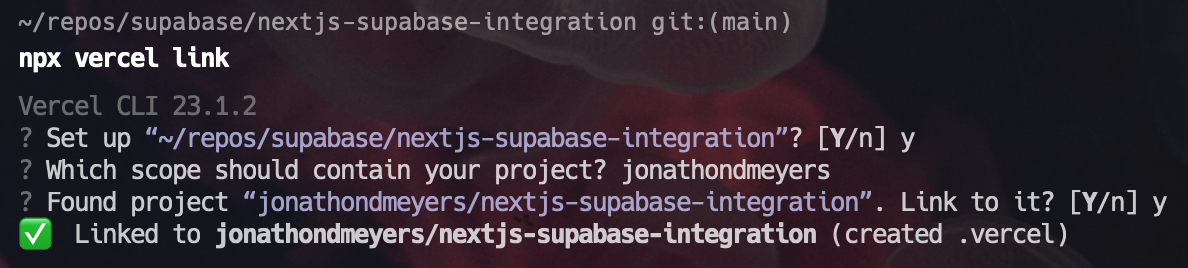
Next, we need to link our Vercel project.
_10npx vercel link
Step through the prompts to link the Vercel project.
Copy the environment variables from our Vercel project.
_10npx vercel env pull
This will create a .env file containing our Supabase environment variables. Rename this file to .env.local to automatically ignore it from git.
Step 5: Install Supabase.js
Install the supabase-js library.
_10npm i @supabase/supabase-js
Create a new file called /utils/supabase.js and add the following.
_10import { createClient } from '@supabase/supabase-js'_10_10export default createClient(_10 process.env.NEXT_PUBLIC_SUPABASE_URL,_10 process.env.NEXT_PUBLIC_SUPABASE_ANON_KEY_10)
Create a new file called /components/NewTodo.js and add the following.
_19import { useState } from 'react'_19import supabase from '../utils/supabase'_19_19export default ({ reload }) => {_19 const [title, setTitle] = useState('')_19_19 const addTodo = async (e) => {_19 e.preventDefault()_19 await supabase.from('todos').insert({ title })_19 reload()_19 setTitle('')_19 }_19_19 return (_19 <form onSubmit={addTodo}>_19 <input value={title} onChange={(e) => setTitle(e.target.value)} />_19 </form>_19 )_19}
This component will be responsible for writing a new todo to Supabase.
Let's import our new component in pages/index.js and display a list of todos.
_26import { useState, useEffect } from 'react'_26import styles from '../styles/Home.module.css'_26import supabase from '../utils/supabase'_26import NewTodo from '../components/NewTodo'_26_26export default function Home() {_26 const [todos, setTodos] = useState([])_26_26 const fetchTodos = async () => {_26 const { data } = await supabase.from('todos').select('*')_26 setTodos(data)_26 }_26_26 useEffect(() => {_26 fetchTodos()_26 }, [])_26_26 return (_26 <div className={styles.container}>_26 <NewTodo reload={fetchTodos} />_26 {todos.map((todo) => (_26 <p key={todo.id}>{todo.title}</p>_26 ))}_26 </div>_26 )_26}
Resources
Details
Third-party integrations and docs are managed by Supabase partners.